Showing posts with label Registry. Show all posts

How to disable Mass Storage function of USB drives?

Posted by Muhammed Posted on Saturday, March 09, 2013


I wrote an article before about to block unauthorized transfer of files from your computer via USB or CD. Here I would like to share a simple registry tweak to disable Mass Storage function of the USB drives those who don’t want to use third party application.


It is possible that we can disable the USB port from BIOS but this will turn off the ability to use USB Keyboards, Mouse and other devices. So the below registry hack will help you to disable the USB Mass Storage function without affecting other function of USB port.

1. Open the Registry by running the command regedit.exe

2. Navigate to HKEY_LOCAL_MACHINE\SYSTEM\CurrentControlSet\Services\UsbStor

3. In the right pane, double click on the Start value name and change the value data to 4 to disable the removable USB mass storage device drive access.

4.To enable the Mass Storage function, change back the value of Start to 3.

You are done!!! The change will take effect immediately.

Test it yourself and share your comments. 

Device Manager is blank or empty - How to fix it?

Posted by Muhammed Posted on Thursday, September 20, 2012
Device Manager


Recently we have heard a problem with Device Manager and it shows blank or empty window when it opens. This behavior occurs if the Plug and Play service is turned off (disabled) or permissions in the registry for the Device Manager Key are corrupt.

Here is the solution for it.

Method1: Enable Plug and Play Windows Service

  1. Click Start, click Run, type services.msc, and then click OK.
  2. Double-click Plug and Play.
  3. If you receive a Configuration Manager message, click OK.
  4. In the Startup Type list, click Automatic, and then click OK.
  5. Close Services.
  6. Restart the computer.

Method2: Edit the registry permissions


Caution: Improper editing registry key may cause system instability. Hence, we highly recommend you to back up the registry settings before proceed.

  1. Go to "Start", "Run", and type "regedit"
  2. Navigate to “HKEY_LOCAL_MACHINE\SYSTEM\CurrentControlSet\Enum”
  3. Right-click on Enum and choose Permissions.  
  4. At this point you will probably notice there are no permissions on this key.
  5. Click "Add" and add the group "Everyone" and the user "SYSTEM".
  6. Select "Everyone" and check "Read" ONLY!
  7. Select "SYSTEM" and check "Full Control".
  8. Click the "Advanced" button and select "Replace permission entries on all child objects with entries shown here that apply to child objects".
  9. Click OK and if a warning message comes up, just click OK
  10. Close “regedit” and restart the computer
If you need more help post a comment here!

How to fix runonce.msn.com runonce2.aspx error in IE7

Posted by Muhammed Posted on Sunday, April 08, 2012


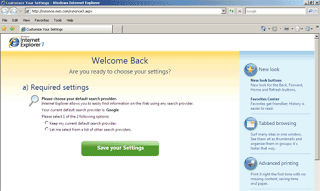
It is a known problem to IE7 users, when they opens Internet Explorer, their home page redirecting to the IE7 start up page runonce.msn.com runonce2.aspx and unable to change the home page or save the setting. The below steps which helps to resolve the problem. 


Windows XP: 


1. Click Start > Run and type the following into the Open box

regedit and  click OK.

2. Using the left-hand pane, navigate to the following registry key:

HKEY_CURRENT_USER\Software\Microsoft\Internet Explorer\Main

3. In the right-hand pane, right-click on RunOnceHasShown and change the value to 1

4. In the right-hand pane, right-click on RunOnceComplete and change the value to 1

5. Close Regedit and restart Internet Explorer 7 


Windows Vista or 7: 


1. Click Start >  and in the search type regedit

2. Right click on regedit and click on Run as Administrator

3. Using the left-hand pane, navigate to the following registry key:

HKEY_CURRENT_USER\Software\Microsoft\Internet Explorer\Main

4. In the right-hand pane, right-click on RunOnceHasShown and change the value to 1

5. In the right-hand pane, right-click on RunOnceComplete and change the value to 1

6. Close Regedit and restart Internet Explorer 7 

Note: If these Dwords are not there create new Dword with name RunOnceHasShown and RunOnceComplete and set the value as 1

The command prompt has been disabled by your administrator

Posted by Muhammed Posted on Saturday, March 31, 2012
cmd

Due to the restrictions placed in Registry when you attempt to run CMD.exe or a batch file, you may receive the message "The command prompt has been disabled by your administrator".   Try the below step to solve the problem.
  1. Open Registry Editor (Regedit.exe) and navigate to:[HKEY_CURRENT_USER\Software\Policies\Microsoft\Windows\System]
  2. In the right-pane, double-click DisableCMD and set its data to 0
OR
Click Start, Run and type or copy this command exactly as given below then click on ok.

REG add HKCU\Software\Policies\Microsoft\Windows\System /v DisableCMD /t REG_DWORD /d 0 /f

Explorer Crashes when right click on any Files or Folders on the Desktop

Posted by Muhammed Posted on Sunday, March 25, 2012
Windows users may experience problem with Windows Explorer and it crashes when right click on any files or folders on the Desktop due to the bad shell extension. For a normal user, it is hard to find what is causing this problem and it may not able to resolve even after complete the repair installation. Here I would like to share a tool ShellExView by Nir Sofer, which can be use to view and manage all installed shell extensions.

The tool will scan the registry for all the shell extensions and displays the description, version details, company information, location, file name and more. You can optionally disable or enable any item that you don t need.

How to use?

Download ShellExView (http://www.nirsoft.net/system_tools.html)and run it. It will scan the registry for all the shell extensions. Once the scan complete, sort the results using "Type" and make context menu handlers are displayed together. Disable non-Microsoft context menu handlers one-by-one and verify if the problem is solved.
This utility works on any version of Windows starting from Windows 98 and up to Windows 7. x64 versions of Windows are also supported.
Here I would  like to share the registry hack for Enable or Disable “Administrator” User account at the Startup screen in Windows XP.  Using this hack, you can also hide other user accounts from the login screen.  You just need to create a DWORD value for the user which you want to hide and set the default value as '0'. 


1. Launch Registry Editor. (Backup the registry before attempting to make any change).
2. Navigate to 
HKEY_LOCAL_MACHINE\SOFTWARE\Microsoft\WindowsNT\CurrentVersion\Winlogon\Specia
Accounts\UserList in the Registry Editor.
3. Create a New DWORD Value – Administrator
4. Double-click the Administrator key and change the value to 
            0 – Hides the user just from the welcome screen.

            1 – The user is shown at the Welcome screen.
5. Restart the computer for changes to take effect.

Enable Show Hidden Files and Folders disabled by virus

Posted by Muhammed Posted on Friday, March 16, 2012

Sometimes the restriction which takes place in the registry won’t let you access the Folder Options or the changes would just disappear upon closing the dialog box.


Try the below steps if the "Folder Options" in "Tools" menu is not visible or it grayed out.
1. Open the Registry Editor (Go to Start - Run and type regedit and click on OK)

2. Then navigate to :


HKEY_CURRENT_USER\Software\Microsoft\Windows\Current Version\Policies\Explorer

HKEY_LOCAL_MACHINE\Software\Microsoft\Windows\Current Version\Policies\Explorer

3. Delete the DWORD value named NoFolderOptions from the right-side pane

4. Restart the computer
If you are not able to save the changes which you made in show hidden files, try the below steps
1. Open the Registry Editor (Go to Start - Run and type regedit and click on OK)

2. Then navigate to :

HKEY_LOCAL_MACHINE\SOFTWARE\Microsoft\Windows\CurrentVersion\Explorer\Advanced\
Folder\Hidden\SHOWALL


3.       Change the DWORD value named CheckedValue to 1

4.       Restart the computer

How to restore broken .EXE file association for Windows 7, Vista & XP

Posted by Muhammed Posted on Tuesday, February 28, 2012

Open with
You may wonder, one day when you try to open any programs in your computer if it gives an error Open with and asks you to choose the program you want to use to open this file. It means that somehow the file association of that application has broken. Here I am describing how you can restore the broken .EXE file association.

1. Open notepad.exe

Note: You may not able to open the notepad directly, so you need to follow the steps.

Open the Task Manager, press CTRL + SHIFT + ESC. Then Click File , press CTRL and click New Task (Run…) at the same time. Command prompt will open and at the command prompt, type notepad, and then press ENTER.

2. Paste the following text into Notepad

For Windows 7 and Vista
----------------------------------------------------

Windows Registry Editor Version 5.00
[-HKEY_CURRENT_USER\Software\Microsoft\Windows\CurrentVersion\Explorer\FileExts\.exe]
[HKEY_CURRENT_USER\Software\Microsoft\Windows\CurrentVersion\Explorer\FileExts\.exe]
[HKEY_CURRENT_USER\Software\Microsoft\Windows\CurrentVersion\Explorer\FileExts\.exe\OpenWithList]

[HKEY_CURRENT_USER\Software\Microsoft\Windows\CurrentVersion\Explorer\FileExts\.exe\OpenWithProgids]

"exefile"=hex(0):


For Windows XP

----------------------------------------

Windows Registry Editor Version 5.00

[HKEY_CLASSES_ROOT\.exe]

@="exefile"
"Content Type"="application/x-msdownload"


[HKEY_CLASSES_ROOT\.exe\PersistentHandler]

@="{098f2470-bae0-11cd-b579-08002b30bfeb}"


[HKEY_CLASSES_ROOT\exefile]

@="Application"
"EditFlags"=hex:38,07,00,00
"TileInfo"="prop:FileDescription;Company;FileVersion"
"InfoTip"="prop:FileDescription;Company;FileVersion;Create;Size"


[HKEY_CLASSES_ROOT\exefile\DefaultIcon]

@="%1"

[HKEY_CLASSES_ROOT\exefile\shell]

[HKEY_CLASSES_ROOT\exefile\shell\open]

"EditFlags"=hex:00,00,00,00


[HKEY_CLASSES_ROOT\exefile\shell\open\command]

@="\"%1\" %*"

[HKEY_CLASSES_ROOT\exefile\shell\runas]

[HKEY_CLASSES_ROOT\exefile\shell\runas\command]

@="\"%1\" %*"

[HKEY_CLASSES_ROOT\exefile\shellex]

[HKEY_CLASSES_ROOT\exefile\shellex\DropHandler]

@="{86C86720-42A0-1069-A2E8-08002B30309D}"

[HKEY_CLASSES_ROOT\exefile\shellex\PropertySheetHandlers]

[HKEY_CLASSES_ROOT\exefile\shellex\PropertySheetHandlers\PEAnalyser]

@="{09A63660-16F9-11d0-B1DF-004F56001CA7}"


[HKEY_CLASSES_ROOT\exefile\shellex\PropertySheetHandlers\PifProps]

@="{86F19A00-42A0-1069-A2E9-08002B30309D}"


[HKEY_CLASSES_ROOT\exefile\shellex\PropertySheetHandlers\ShimLayer Property Page]

@="{513D916F-2A8E-4F51-AEAB-0CBC76FB1AF8}"


3. Then save the file as .reg and import to registry by double click on the file
4. Restart the computer